Showing posts with label sewing with kids. Show all posts

Saturday, August 10, 2013

{Repurpose} Warm-Up Pants into an American Girl Outfit

I LOVE to repurpose old stuff.  So, when we got a hand-me-down warm-up pants with a hole in the knee. After I cut the pants and made them shorts, I put the leftover fabric to the side. With doll clothes on my mind, I decided it was time to convert these scraps to an American Girl Outfit.  


These pants should be 7" wide.
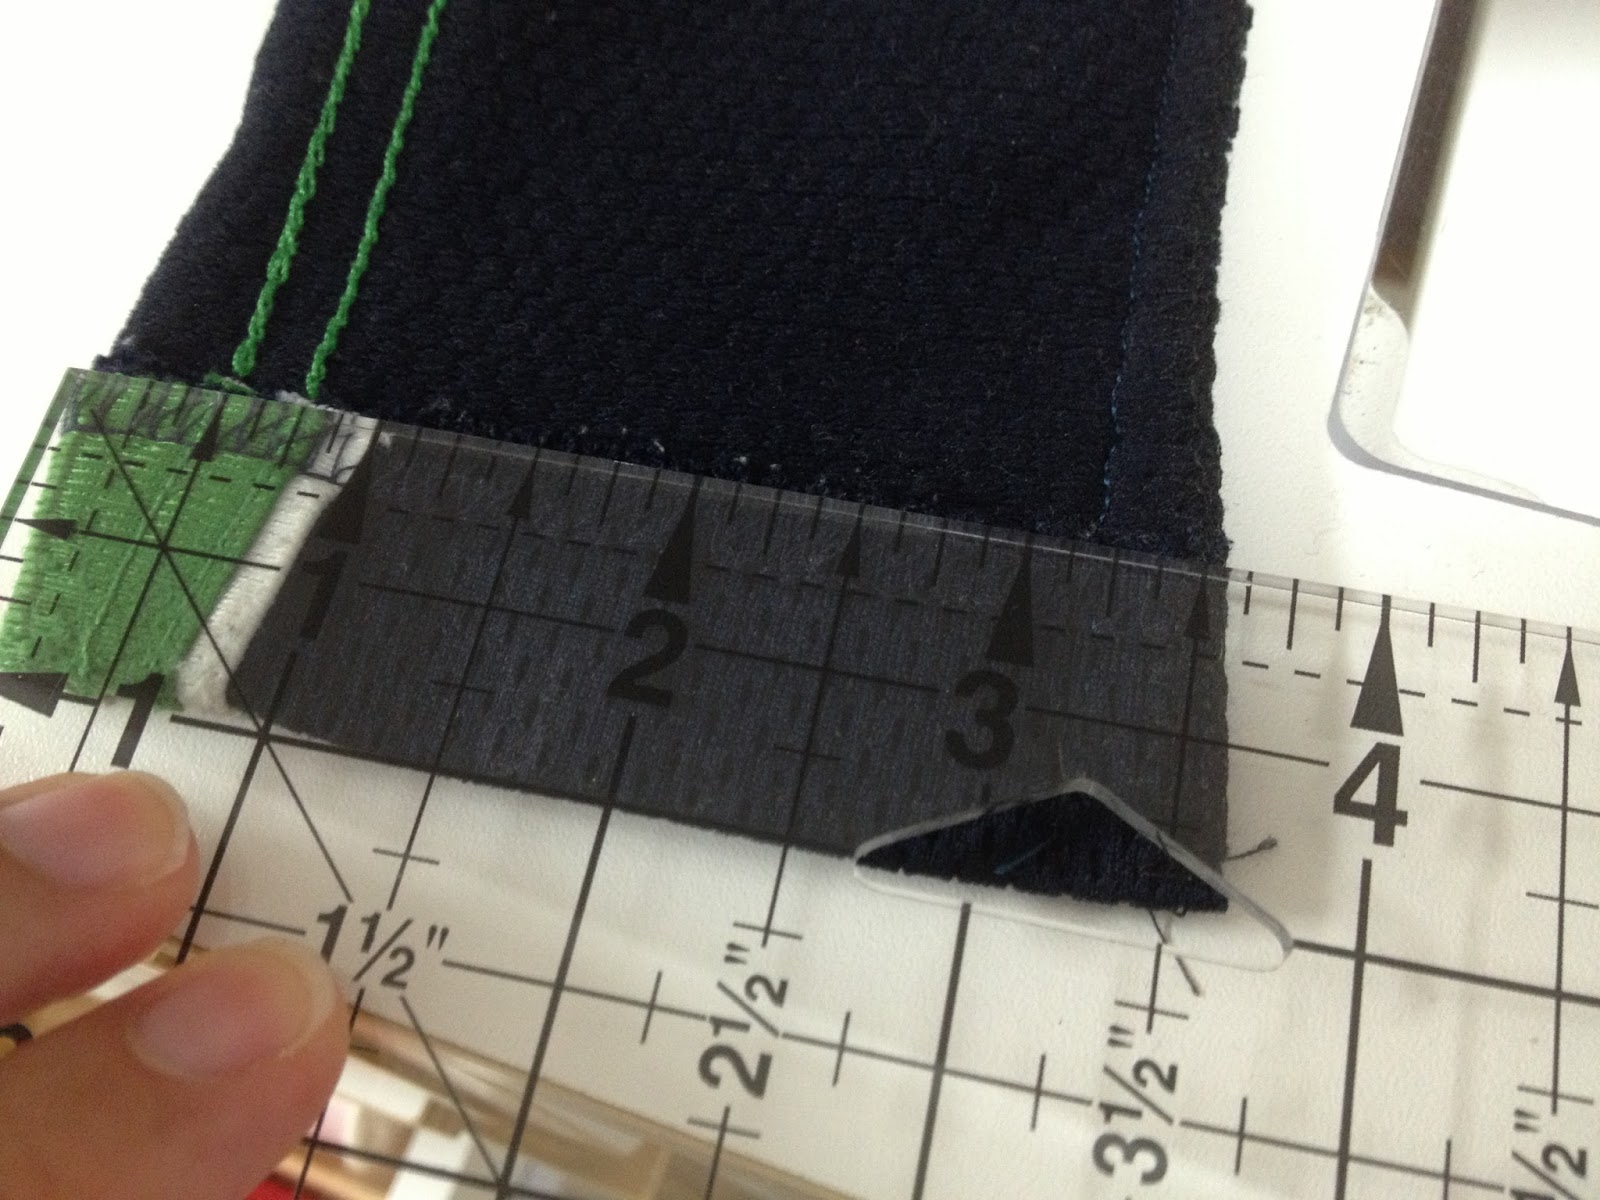

 The crotch is 5 1/2" long. Remember this is working with an existing hem. I do not cut any higher than the 5 1/2". It's not time yet because you will attach them soon.


 Put the to legs of the pants together and pin them together.  Then sew in a U-Shape around the front to the crotch and then around to the back.  If that seems too hard, start at the front and sew to the crotch. Stop. Sew from the back to the crotch. Then trim the excess fabric from the seam. Do not cut the waist line. 


 Measure elastic.


You can sew the elastic right onto the material, or just sew the elastic together. Then turn the edge of the outfit under and sew. Be careful not to sew on your elastic.


I had to clip the seams around the curve of the pant to make sure there wasn't any pucker around the seam. Here's a Youtube video on clipping curves if it is new to you.


Now it's time for the top. I used the same pattern as the top for the Free Ballerina Outfit. I made it a little longer and did not cut leg holes like I would have for the leotard.


Happy Sewing!!
~Julia

Thursday, July 18, 2013

DIY Water Bottle Holder and Giveaway!

My daughter, Natalie loves to sew. I am always hunting for easy projects that she can do. Sewing School 2 is an excellent book for beginner sewers.  It comes with the patterns in a pouch in the back and very detailed easy to follow instructions complete with pictures.


Natalie chose a water bottle holder on page 139.  I love to repurpose, so we used an old dress. In 12 steps, she had a finished product that she is still wearing :) Sewing School 2 is a great resource for "Summer School", too. What's even better is we have one to giveaway with Rafflecopter below!!


For more inspiration, check out these blogs 
who are also participating in this Blog Tour.

July 8 – Scrumdilydo
July 9 – Crafty Mom Share
July 10 – Jane of All Trades
July 11 – Windy Lou
July 13 – Our Improve Diary
July 16 – He Sowed She Sewed
July 17 – Teach Beside Me
July 19 – The Crafty Crow The Crafty Crow
July 21 – Such Designs
July 22 – Red Bird Crafts
July 23 – The Long Thread
July 25 - Maya Made

Friday, December 14, 2012

Adorable Little Girl Apron

Here's a pattern for an adorable girls apron. Create a matching one for her 18" doll too! The apron pictured on the left was made for a Christmas gift and turned out beautifully. I added a string of "pearls" to each apron for fun. You can purchase strands of inexpensive beads like these at any craft store. They can be cut and sewn onto your fabric just as I have done. Get creative with other embellishments, there are so many possibilities! I've included pictures to help you along the way. The PDF pattern and instructions are located at the bottom of this post. Please feel free to ask me any questions you may have, I'd love to help! 


For the tutorial below, I was using scrap material, so I cut mine from two fabrics. You could use the same fabric, or change it up like I did.


When I sew I like to have a lining, so I cut two.  I sewed right sides together, but don't forget to add your ties and neck strap before you sew them together.


I pinned the ties and straps in place in the center of the apron, so when I was sewing they wouldn't inadvertently get caught in the seam.


I also pinned and the neck strap the same way.


Next pin the right sides together leaving a section between the neckties open, so you can turn it right side out.


If you would like a ruffle, take a 4 in piece of fabric and turn the edge under. Gather the top and pin it in side just like the ties.


Sew


Turn it right sides out.


This is what that will look like. Press. 


Then sew a top stitch over the part that you left open to turn your apron.


If you don't want to have a lining, a faster way with less fabric. Turn the edge under and then add your straps and ties.


*****************************************************************
DOWNLOAD THE PATTERN NOW FOR FREE: GIRLS APRON PATTERN


Instructions:
   Cut two apron ties 22 inches by 2 inches
   Cut one necktie 18 inches by 2 inches
Optional Ruffle:
   Moderately full - 41 inches by 5 inches
   Full - 55 inches by 5 inches
   Tape the four pattern pieces together and cut
   One or two for a reversible apron


Have fun! ~Julia