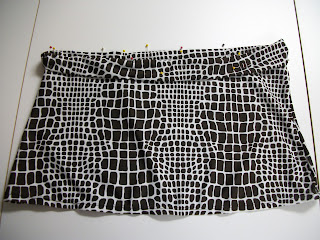
Swimsuit shopping is right up there with going to the dentist. Unfortunately, when you want to find a modest swimsuit, I have not been able to find a deal. I love deals so it pains me to pay $70 plus dollars for a swimsuit. Especially one I am going to wear in a lake! On a recent trip to Goodwill, also known as GW Fashions, I had an idea. I saw two matching tops new from Target. I bought one Medium top, and one Large top to convert to a cover-up skirt. I will keep the medium top as-is and wear it as the actual top. I spent $2.99 per top, so a total investment of $6 bucks. I already had the brown swimsuit bottoms. In actuality the patterns match on the top and the bottom, but I twisted it so the difference between the top and the bottom could be easily seen. Here's the tutorial.
Step One
Cut the top off the LARGE SWIMSUIT TOP. I cut as close to the edge as possible
to give myself the most material.
Step Two
Serge around the edge to finish it and give me a starting place.
*Make sure you practice on fabric you aren't using
before you use your serger.
Step Three
Try it on to determine the length you want.
Mark it with pins placed horizontally.
Step Four
Pin the back with the amount of fabric you need to
cover the elastic of your choice. I prefer to use an inch.
Step Five
Pin all the way around the top. Try it on again to make adjustments.
My swimsuit style was gathered in the front, so instead of fighting it,
I went with it. I folded the edge down as shown giving it an extra
detail in the front.
Sewing Tips:
When sewing on swimsuit material, it's best to use a Ball Point needle.
If you have a teflon, smooth glide foot, this is the time to use it.
That foot helps the material go through with less resistance.
Step Six
Sew one side of the elastic into the side seam from the inside.
Step Seven
Try the skirt on again to see how much elastic you need across
the back only. The front will not have elastic. Then pin it.
Step Eight
Pull the elastic to the right length.
Sew the elastic to the fabric on the outside of the skirt.
Trim the excess elastic.
Step Nine
Sew across the top front.
Step Ten (Optional depending on your design)
Sew across the bottom front.
Step Eleven
On the top back, prepare to sew the casing for the elastic.
Turn the edge under. Pin. Sew on the right side feeling for
the edge as you sew. Sew halfway, then with your needle still in,
pull the fabric to the side you have already sewn. Finish sewing the
elastic casing with the ease of sewing on flat fabric.
Step Twelve
Evenly distribute the fabric in the back to both sides.
Sew straight through the fabric and the elastic.
This will keep your elastic from turning while you
are wearing your suit.


No comments:
Post a Comment